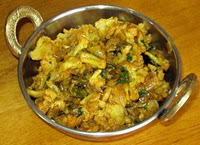
boondi

Boondi 

Ingredients
1 cup gram flour
1/2 cups sugar
1 cup water
1/4 tsp. cardamom powder
6-8 chopped almonds
ghee to deep fry
perforated flat spoon about 5" diameter
Method
1.Boil the sugar and water together. Add a tbsp. of milk to bring up the scum.
2.Remove scum and boil liquid till the syrup is sticky between the fingers.
3.Keep aide, but keep warm for use.
4.Make batter with gram flour, which should not be too thin.
5.The batter should evenly coat the back of a spoon when dipped in it.
6.Heat ghee, hold perforated spoon a little above the hot ghee, pour some batter on the spoon.
7.Tap very lightly at edge of spoon to allow small droplets to fall in the ghee.
8.Pour back remaining batter and wipe spoon.
9.Stir the boondis in the ghee gently and fry till crisp but not brown.10.Drain and put into the syrup. Keep for 3-4 minutes before draining from the syrup.
11.Spread on a wide plate, add cardamom powder, almonds and mix gently.
12.Cool completely and loosen the boondi with finger till each droplet separates.
13.Store in airtight container.
Note: Take great care while dropping the boondi in the hot ghee so as not to burn yourself. A little practice and it is
very easy.
Making time: 30 minutes.
Makes: 3 cups approx.

Spicy Items

Spicy Khaja

Ingredients
2 cups gram flour
1/2 cup plain flour
2 tsp. red chilli powder
1/2 tsp. omam seeds (ajwain)
1/2 tsp. cumin seeds
1 tbsp. coriander very finely chopped
1 tbsp. oil
salt to taste
oil to deep fry

Method
1.Mix both flours together.
2.Make a well in the centre, add all other ingredients, except oil to deep fry.
3.Mix them well in the flour.
4.Add enough water to make a soft pliable dough.
5.Divide dough to make small (4" diameter) thin rounds.
6.Prick on both sides with a fork.
7.Allow to dry on a clean cloth for 25-30 minutes.
8.Deep fry in hot oil till a light browning appears.
9.Do not over fry.
10.Drain and cool completely before storing.
Making time: 30 minutes
Makes: 25-30 pieces
Sweet Kachori

Ingredients:
For filling:
200 gms. khoya
50 gms milk powder
1/2 tsp.nutmeg-cardomom-cinnamon powder
For cover:
250 gms. plain flour
1 tbsp. cornflour
30 gms. ghee
For syrup:
250 gms. sugar
1 cup water
1 big pinch saffron
Ghee for deep frying

Method:
1.Mix ingredients for filling. The mixture should be soft and crumbly.
2.Mix ingredients for cover. Using water knead to a pliable dough.
3.Cover with a wet cloth. Keep aside
4.Boil sugar and water adding a tbsp. of milk to clear the syrup.
5.Boil till the syrup is slightly sticky between the fingers.
6.Strain. Crush and add the saffron. Keep aside.
7.Make 15 to 16 flattish balls of the mixture.
8.Divide dough also into 15 to 16 parts.
9.Roll one part into a puri, place one mixture ball in the centre.
10.Pull up all the sides to seal the mixture and press in centre.
11.Make 5 to 6 such kachoris, heat ghee and fry on low flame till light brown, turning once.
12.Repeat for remaining kachoris.
13.When slightly cool, make a hole in the centre of each (approx. 2cm. diameter).
14.Pour about half tbsp. of syrup and roll kachori around to let the syrup spread.
15.Allow to stand for half hour before serving. Note: The unsweetened kachoris may be stored without refrigeration for
one week and
sweetened as required .
Serves:15 helpings .
Time required:2 hr.
Shelf life: 10 days .

Mirchi Bajji

Mirchi Bajji


Ingredients: 
1.Long, Stout Chilies – 8 
2.Tamarind – Gooseberry Sized 
3.Carom Seeds(Ajwain) – 1 1/2tsps 
4.Salt To Taste 
5.Gram Flour – 1 Cup 
6.Baking Powder – 1/4tsp 
7.Oil To Deep fry


Preparations: 
Take tamarind in a microwave safe bowl and add little water. Microwave this on high for 30 seconds. Stir and microwave again on high for 30 seconds. Keep aside. Take a mixie jar and add Carom Seeds (Ajwain). Add salt and the tamarind along with the tamarind water. If you have any doubt that the carom seeds do not get crushed to a fine paste, first powder them in a mortar and pestle and then add to the mixie jar. Now make a fine paste of the above ingredients. Take it into a plate and keep aside. Slit the chilies length wise and remove the seeds with the help of a spoon. Do not remove the seeds if you want the bajjis to be hot. If you want you can remove half seeds and keep half seeds so that the bajjis will be hot but not burning. Stuff these chilies with the tamarind mixture and keep aside for 4 to 5 hours. By doing this your bajjis will not be hot at all. The chilies get a nice flavor of carom seeds and tamarind and will be tasty. 

Method: 
Take gram flour in a bowl and add salt. Add baking powder also and mix. Slowly add water to get batter in right consistency. Heat a pan and add oil to it. To test whether the oil is sufficiently hot or not, drop a few drops of the batter into the oil. It should first sink and then slowly rise to the top. Then the heat is right. If it pops up immediately then switch off the heat and let it cool. Another way of cooling the oil is to add cold oil to it. Now dip the prepared chilies in the batter and drop them in the oil and fry on medium heat. Fry till golden brown. When done remove them on to the paper napkin to remove excess oil. Serve them hot. 

Points to Remember: 
 Make the gram flour batter 2 hours before you fry the chillies. Then they will puff rightly. Because of baking powder these chillies get browned fast. So fry them only on medium heat stirring all the while to get even browning. Remove the seeds from the chilies according to your taste. If you want them hot do not remove seeds. If you want them less hot then remove half the seeds. If you do not want it hot then remove all the seeds. After removing the seeds you can take some and grind along with the tamarind pulp also and stuff thereafter. It purely depends on your tastes. 

Tip: 
At times the stuffing comes out while frying and the oil gets spoilt. Do not worry. There is one age old tip. After frying the bajjis , take the pan away from heat and add some tamarind to the hot oil . Let the tamarind get fried completely. It becomes black and dry. Cool the oil along with the tamarind. Then strain it through a strainer and you get clear oil . But do not fry the oil repeatedly. It is not good for health as the property of oil changes once it is heated to high temperatures. So take less quantity of oil for frying and fry the chilies in 2 to 3 batches instead of one batch with more oil. Like this the oil remaining after frying will be less to get consumed. But remember not to use this oil for deep frying. Rather use this oil for daily cooking where you use only 2 to 3 teaspoons only. 


Variations: 
After frying these bajjis slit them length wise and keep aside. Chop onions finely, add some lemon juice and mix well with fingers. Stuff this onion mixture in the fried bajjis and serve. They taste excellent. 
 Or
Cut the bajjis into round pieces and spread them in a plate. Sprinkle chopped onions above these pieces. Sprinkle some lemon juice, some fine sev and serve as chat. 
Or
Cut the bajjis into round pieces and spread them in a plate. Take some whisked curd(smoothened curd) and add to the bajji pieces. Add tamarind chutney and green chutney to them. Sprinkle some tamarind chutney and green chutney. Cover with fine sev. Garnish with grated coconut and chopped coriander and serve.

Enjoy!!!!!!!!!!!!!!

Cabbage Vada

Cabbage Vada

 
Ingredients:
  • Black Gram – 150gms (3/4Cup)
  • Cabbage – 250gms
  • Salt – To Taste (1/4tsp)
  • Ginger – Small Piece
  • Green Chilies – 4
  • Onion – 1 (50gms)
  • Chopped Coriander – 1Tbsp
  • Oil – For Frying

    Preparations:
    Soaking Dal:
    Take black gram into a bowl and add water. Wash the dal and drain the water. Add water to the washed dal and soak overnight.

    Other Preparations:
    Arrange thin slicer blade in a food processor bowl and slice the cabbage. Take the thinly sliced cabbage into a microwave safe bowl and add salt. Mix well and place this bowl in a microwave oven. Cover the bowl partially and cook on high power for 4 minutes. Stir once and add 15ml water if required. Stir once again and place the bowl in microwave oven. Cover partially and cook on high power for 4 minutes. Cool the cooked cabbage and remove water by pressing. Use this cabbage water while grinding the dal.
    Wash ginger and green chilies and make a coarse paste in a mixer grinder.
    Peel the onion and slice it thinly.
    Remove water from the soaked dal and grind to a smooth and thick paste. Add cabbage water while grinding, if required. Add very little water while grinding. As there is water in the cabbage water, add just sufficient amount of salt to the batter that too if required only.

    Method:
    Heat a pan and add sufficient oil to fry the vadas. Spread a paper napkin in a plate. After frying the vadas, place them on this paper napkin to soak excess oil. While the oil is getting hot prepare the batter.
    Beat the batter with a spoon to make it light. To test, drop a small portion of the batter in a bowl of water. If the batter sinks that indicates the batter is not light yet – so beat for some more time. If the batter floats, that indicates the batter is light—start making the vadas.
    To the prepared batter add ginger-green chili paste, sliced onions, cooked cabbage and mix well. Add chopped coriander and mix once again.
    Take a portion of the batter with wet fingers and place it on a wet plastic sheet. Shape the portion of the batter with wet fingers like a vada. Carefully drop the patted vada batter into the hot oil. Fry two or three vadas per batch. Do not crowd the oil and fry more—allow space for the vadas to get fried in oil. Fry the vadas on medium heat till brown and crisp. Drain the fried vadas from the oil and place them on the paper napkin which will soak all the excess oil. Similarly fry vadas using the prepared batter. Serve the cabbage vadas hot with any sauce or chutney or as it is.

    Points to Remember:
    Soaking the dal overnight gives a right texture for the batter.
    Add very little water while grinding the dal. Similarly add salt if required only as we have added salt while cooking the cabbage and the dal is ground with cabbage cooked water which has salt.
    Cooking cabbage removes the rawness. Drain water from the cooked cabbage by pressing—if not the consistency of the batter changes. If there is more water in the batter, it will be difficult to shape the batter like vadas and such vadas when fried in oil will soak more oil. So remove all the water from the cooked cabbage and use very little water while grinding the dal.
    Beat the batter to make it light. To test drop a small portion of the batter in a bowl of water. If the batter sinks, beat the batter for some more time till it is light. If the batter floats, the batter is light and start making vadas. Making the batter light is very important—otherwise the vadas will be hard and tasteless. In earlier days they used to grind the dal in a mortar and pestle—while grinding this aeration used to take place and it was not necessary to beat the batter separately. But in present days we grind the batter in a mixer grinder mostly which needs the step of aeration.
    These vadas taste better as they are—no accompaniments required, as there is cabbage, onions, green chili and ginger to bring that extra taste. But they also taste good with tomato sauce. In any case serve hot to enjoy the great taste.
    Enjoy !!!!!!!!


Sweetened Condensed Milk

Sweetened Condensed Milk

Ingredients
1/3 cup water
2/3 cup sugar
1 cup dry milk powder
3 tablespoons butter


Heat water in the microwave until steaming hot.
Add remaining ingredients into a large bowl, add hot water and carefully whisk or blend until smooth.
Store in air tight container until you are ready to use.

HINT: Want to make it especially yummy? Add 1/2 tsp of vanilla to the milk for a light vanilla flavor!

This milk is great in recipes, tea and even coffee. Enjoy! 

Gulaab Jamun with Paneer

Channarpuli (Gulaab Jaamun with Paneer)

Ingredients:
  • Sweetened Condensed Milk – 100gms
  • Paneer – 125gms (Preferably Homemade and one day old put in fridge)
  • Maida – 3 1/2tbsps
  • Baking Powder – 1/4tsp
  • Ghee – 1/2tbsp
  • Cardamoms – 3
  • Sugar 1 1/2Cups (Cup = 200ml)
  • Water – 1 1/2Cups (Cup = 200 ml)

    Preparations:
    Bring the Paneer out of the fridge and keep it in the kitchen before two hours of actually making the recipe. Paneer should be at room temperature. Grate this paneer in a mixer grinder. Add condensed milk, maida, baking powder and ghee to the grated paneer and run the mixie to get a sticky smooth paste. Transfer the prepared mixture to a bowl and keep it aside for 20 minutes. Do not worry about the stickiness. In the standing time of 20 minutes the paneer would absorb the condensed milk and the mixture would be amenable for making round balls.

    Method:
    Take a bowl and add sugar & water to it. Prepare sugar syrup by placing this bowl on flame. Remove the skins of cardamoms and powder the seeds. When the sugar syrup is boiling, add the cardamom powder and mix well. Place this bowl in a rice cooker in “KEEP WARM” mode to keep the syrup warm.
    After 20 minutes the sticky dough becomes manageable to make round balls. A total of 18 balls can be made from this mixture. To begin with make 7 balls from the dough. For making balls take sufficient dough and press between palms. Then rub the pressed dough in circular motion to get a smooth round shaped ball. Prepare 7 similar balls (Pulis). 
    Heat a pan and add oil to it. To test the right hotness of oil take a small piece of dough and put it into the oil. The dough first sits at the bottom of the pan and then slowly rises to the top—that is the right temperature at which we have to fry the PULI’s. If the dough rises fast from the bottom of the pan, it indicates the oil is overheated. You need to switch off the stove and wait for a while.  If you have a thermometer the oil should be 105 degrees centigrade.
    Take a slotted spoon and turn the oil to make whirls. Now slowly add the PULI’s stirring the oil all the while. Stir oil with the slotted spoon without touching the PULI’s when they are just put in the oil. Keep stirring the oil throughout. After few minutes the PULI’s will rise to the top detaching from the bottom of the pan. If required, after a while you may just nudge them a little to dislodge and rise. When they are golden brown in color remove from oil. Keep the PULI’s aside for 3 to 5 minutes before adding them to the warm syrup. Switch off the stove as the temperature of the oil will be more to fry the next round of PULI’s. After 5 minutes add the fried PULI’S to the warm syrup. Stir the cooked PULI’s in intervals.
    Now again switch on the stove and make seven more balls. Test the heat of the oil before adding the Pulis. Fry them as mentioned earlier. Similarly make balls till Do not be alarmed with the stickiness of the dough when made. It would be alright in 20 minutes standing time.
    Take care of the temperature of the oil. The success of the recipe lies in frying the PULI’s at right temperature. For this all you need is LOTS and LOTS of PATIENCE.
    Do not crowd the oil pan by adding  more balls to the oil while frying. As the balls become double in size ensure free space for the balls to move around. Even if you are left with little dough for the last batch, do not add more balls to the oil. Fry the PULI’s and soak them in warm syrup. Soak all the PULI’s in the syrup and keep this bowl in rice cooker in “KEEP WARM” mode for at-least 2 hours. After 2 hours the CHANNAR PULI’s (Gulab Jamuns) would be ready to be served.

    Points To Be Noted:
    Do not touch the PULI’s while frying till they rise up all by themselves. Otherwise they will stick to the spoon you are using and they lose shape. So just stir the oil without touching the PULI’s. At best nudge them to rise after a while.
    Keep the sugar syrup warm till you finish frying all the PULI’s. The best method is to keep the syrup bowl in rice cooker in “KEEP WARM” mode. If you don’t have a rice cooker keep it in normal warm closed cooker. After 2 hours of soaking in warm syrup the PULI’s absorb the syrup and become juicy. To test this cut a PULI into half and see. If the PULI is not fried well then you will find a white colored circle in the centre of the PULI. Such Puli’s will not absorb sugar syrup.
    If the oil is too hot the Puli’s would turn to golden color very fast without being cooked inside, forcing you to try the recipe all over once again. Such Pulis when added to syrup will not absorb sugar syrup. Hence take care not to fry  Pulis in hot oil.
    This is a Bengali recipe. The recipe comes out well if the procedure is strictly followed. Those of you who are young and not weight conscious may fry the Pulis in Ghee or Vanaspati for enhanced taste.

    Enjoy !!!!!!!!!!!!!!


Vepudukaram - Spice Powder

Vepudukaram - Spice Powder

( to sprinkle on Fries)


Ingredients:
  • Coriander Seeds – 5 to 6Tbsps
  • Cumin Seeds – 6 To 6 1/2Tbsps
  • Mustard Seeds – 1 1/2Tsps
  • Black Pepper – 15
  • Salt 2 1/2 To 3 1/2Tsps
  • Turmeric Powder – 1 Tsp
  • Red Chili Powder – 100gms
Method:
Dry Roast Coriander seeds, Cumin seeds, Mustard seeds and black pepper. You can microwave them alternatively. Microwave the above 4 ingredients for 30 seconds on high power, stir once and again microwave on high power for 20 seconds. Take these roasted ingredients into a mixie jar and powder them. To the powdered ingredients add Salt, Turmeric Powder & Red Chili Powder and grind it to a fine powder. Store this prepared Vepudu karam in an airtight jar.
It can is used to spice the fried vegetables and garnish a few gravy recipes which I would be hosting on this site.
Enjoy !!!!!!!!!!!!!!

Cauliflower Vepudu (Fry)

Cauliflower Vepudu (Fry)

Ingredients:
  • Cauliflowers
  • Oil for Deep frying
  • Vepudukaram
  • Salt
  • Turmeric Powder

    Preparations:
    Take two/ three medium sized cauliflowers and remove the stems. Cut the cauliflower into florets of medium size. Wash them thoroughly and drain them into a slotted bowl. Take these washed cauliflower pieces into a microwave safe bowl and add some water ( around 15 ml). Cover partially and microwave on high power for 5 minutes. Stir once and microwave again on high power for 5 more minutes. After 5 minutes standing time, remove from the oven. You will observe that the cauliflower pieces are 80% done but not fully cooked. Drain them into a slotted bowl to remove excess water.

    Method:
    Heat a pan and add oil to deep fry the cauliflower pieces. When oil is hot add sufficient cauliflower pieces to it and fry on medium heat. Stir continuously for even browning. Fry till the cauliflower pieces get orange color. Drain them on to a newspaper / paper napkin to remove excess oil.
    Take a deep bowl and keep vepudukaram, salt and turmeric powder nearby. Add the cauliflower pieces to the deep bowl and add sufficient turmeric powder, salt and vepudukaram. Toss the cauliflower pieces so that the all the pieces get the spices evenly. Transfer the spice coated cauliflower pieces to a serving bowl.
    Repeat the process of frying cauliflower and coating them with spices. Once all the cauliflower pieces are fried toss all the cauliflower pieces once finally. Serve hot with plain rice.

    Points to Remember:
    Cut cauliflower pieces into even sized (medium) pieces so that while frying they get evenly browned.
    Wash the cauliflower thoroughly. At times we see worms on the flowers, so it is better to dip them once in hot water. Just add water enough (10 to 15 ml) to cook the vegetables, so that they are not fully cooked. When cooked, the vegetables should be soft to touch but hard to mash them. 
    Take care while dropping the cauliflower pieces to the hot oil, as the pieces are wet the oil splutters causing oil burns.
    You may choose the level of frying as per your choice. However I feel that if you deep fry too much there may not be much taste of the vegetable left to relish. Instead a medium fry should be good enough.
    Add the spices and Vepudukaram when the cauliflower pieces are still hot. The salt melts and the spices would stick to the hot and wet cauliflower pieces giving them good color and taste.

    Important Point:
    Take around 100 or 125 ml oil to fry the cauliflower pieces. Add just sufficient pieces per batch to fry. This way almost all the oil will be used up. As it is said that it is not good to reuse fried oil, increase the number of batches to fry using less oil for deepfrying. 
    Do not cover the container containing the cauliflower fry with a lid. Cover  it with a paper napkin only till it is served.
    Here it is not mentioned exactly as to how much cauliflower and spices are
    used. Use as many cauliflowers as you want and add spices according to your taste—there is no restriction. This cauliflower fry tastes very good, making all your family members relish and ask for more.

    Enjoy !!!!!!!!!!!!!!

Cauliflower Bonda

Cauliflower Bonda

Ingredients:
  • Cauliflower Florets – 500gms
  • Gram Flour – 250gms
  • Rice Flour – 50gms
  • Green Chilies – 7
  • Red Chili Powder – 1/2tsp
  • Salt – To Taste
  • Oil – 2Tbsps (To Mix In The Flour)
  • Cumin Seeds – 1/2tsp
  • Chopped Coriander – 2Tbsps
  • Baking Soda – 1/4tsp
  • Water – 400gms(Approx.)
  • Oil – For Deep Frying

    Preparations:
    Wash green chilies and grind in a mixer grinder. Add cumin seeds to the ground chilies and crush slightly. Take this chili mixture into a plate & keep it aside.
    Wash cauliflower florets. At times we find worms in cauliflower. To get rid of the worms, wash florets in warm water. Cut the stems of big florets as shown in the movie clip—this will allow the florets to cook evenly. Add the washed florets into a microwave safe bowl and add 30 ml water. Place this bowl in microwave oven and cover it partially. Cook the florets on high power for 5 minutes and allow 2 minutes standing time. We need to just parboil the florets. When raw cauliflower florets are dipped in batter & fried, it will not get cooked from inside—to get evenly cooked & fried bondas we need to parboil the florets before frying bondas. Drain the parboiled florets into a slotted bowl to remove excess water. Cover & keep the drained florets aside to cool completely.
    Take a big mixie jar and add gram flour, rice flour and salt. run the mixer grinder to mix the ingredients. Add 2Tbsps of oil into the flour mixture and run to mix well. Scrape the mixture sticking to the sides of the jar in between and run the mixer grinder to incorporate the oil well into the flour mixture. Now add water little by little and run the mixer to form a smooth batter. Use a spatula to bring the mixture sticking to the sides of the jar and blend adding water. Do not add all the water at one go---to maintain the consistency of the batter add water in small intervals and prepare the batter. finger dipped in batter should coat it evenly. After preparing the batter add red chili powder, chili-cumin paste and mix. Then add chopped coriander and mix again. Take this prepared batter into a bowl and cover it. Keep this batter bowl aside to rest for 30 minutes.

    Method:
    Heat a pan and add sufficient oil to fry the bondas.
    After 30 minutes, add baking soda to the batter and mix well. Remember to add baking soda just before frying the bondas.
    Spread a paper napkin in a plate. After frying the bondas placing them on the paper napkin will soak excess oil.
    Test the heat of the oil by dropping a portion of batter. If the batter comes up at once, it indicates oil is hot enough to fry the bondas. Dip the parboiled floret in batter and lift to drain excess batter. Carefully add the batter coated floret to the hot oil. Similarly add few more florets to the oil for frying. After some time the bondas will increase in size. So add sufficient batter coated florets to the oil for frying. Fry on medium heat stirring and turning the bondas in between for even frying. When the bondas are golden in color, take them out of the oil with a slotted ladle and place them on the paper napkin. Fry the remaing florets in the above method on medium heat. Serve the bondas hot with sauce, ketchup or any chutney of your choice.
    It is advisable to have buttermilk after eating the bondas. Buttermilk is an antidote for fried items.

    Points to Remember:
    Use fresh cauliflower whose florets will be crisp & firm.
    Add seasonings (red chili powder, salt etc…) according to taste.
    Wash cauliflower thoroughly. To get rid of worms in cauliflower dip the flower in warm water for a minute or so. Then break the cauliflower into florets. If the florets are too big, cut the stems keeping the floret intact as shown in the movie clip for even cooking and frying. Parboiling the florets cooks the bondas from inside removing the rawness of cauliflower. Remember only to parboil and not boil the florets. Cooked florets will not retain the shape to dip them in batter. so only parboil the florets to get cooked partially and to retain shape. The remaining cooking of florets will take place while frying the bondas.
     Preparing the batter in a mixer grinder is an easy way to make a lumps free smooth batter.
    Remember not to add all the water mentioned at one go. Adding more water makes the batter thin and will not coat the florets properly. Check the consistency of the batter by dipping finger in the batter---batter should evenly coat the finger as shown in the movie clip.
    Remember to add baking soda just before frying the bondas.
    Take care while dropping the batter coated florets into the hot oil.
    Fry on medium heat only to get evenly fried bondas.
    Serve the bondas hot with any chutney or sauce of your choice.
    Most important thing to remember is to drink a big glass of buttermilk after eating the bondas as buttermilk is an antidote for fried things.


    Enjoy !!!!!!!!!!!!!!

Bread Pizza

Bread Pizza

Basic Ingredients:
  • Bread Slices (Big Size)
(I have used a bread baking tin measuring length 6”, Breadth 5” and Height 4 1/2 “)
  • Pizza Sauce
  • Pizza Topping
  • Home-Made Pizza Cheese
               Or
  • Mozzarella Cheese (Readily Available)
  • Pizza Cutter Or A Sharp KnifeStep-By-Step let us see the procedures of the above mentioned ingredients
    Making Bread:
    Pizza Cheese:

    Ingredients:
  • Unsalted Butter – 50gms
  • Home-Made Paneer – 50gms

Method:
Before making the cheese ensure that butter is chilled till hard and paneer is chilled till firm. Cut chilled butter into cubes. Similarly cut paneer into cubes. Take a mixie jar and add butter and paneer and blend. Mix with a spoon at intervals and blend the mixture till smooth. Take a disposable cup and fill it with the prepared cheese. Cover the cheese cup with cling film and freeze it till hard. After 3 to 4 hours the cheese will be ready. If wished one may use the readily available mozzarella cheese.

Pizza Sauce:
Ingredients:
  • Capsicum – 1 (90gms) {Deseed and use half capsicum}
  • Tomatoes – 4 (360gms)
  • Onions – 2 (80gms0
  • Garlic Cloves – 4 (5gms)
  • Salt – To Taste (3/4tsp)
  • Sugar – 1tsp
  • Red Chili Powder – 1tsp
  • Oregano – 1/4tsp
  • Italian Seasoning – 1/2tsp
  • Crushed Fennel Seeds – 1/4tsp
  • Olive Oil – 1Tbsp
Preparations:
Wash capsicum, deseed and use half for making the sauce. Take half capsicum and cut into small pieces. Wash and chop the tomatoes. Using a mixer grinder make paste of the chopped tomatoes. Peel and cube onions. Make a coarse paste of the onions in a mixer grinder. Peel and grate garlic.
Method:
Heat a pan and add oil to it. When oil is hot add the grated garlic and onion paste. Fry the onion mixture till it is somewhat dry. Then add capsicum pieces and mix. Add the tomato paste, mix and cook covered on medium flame for 5 to 7 minutes. Remove lid and mix with a spoon. Then add salt, sugar. Red chili powder, oregano, Italian seasoning, crushed fennel seeds and mix well. Cook on low flame for 10 minutes or till the sauce reaches desired consistency. See that the consistency of the sauce is neither too thick nor too thin. Transfer the prepared pizza sauce into a bowl.


Pizza Topping:
Ingredients:
  • Chopped Onions – 45gms (1/4Cup)
  • Chopped Capsicum – 35gms (1/4Cup)
  • Sweet Corn – 70gms (1/2Cup)
  • Chopped Mushrooms – 50gms (1/4Cup)
  • Chopped Tomatoes – 20gms (1/8Cup)
  • Salt – To Taste (1/4Heaped tea spoon)
  • Black Pepper Powder - (1/4Heaped tea spoon— freshly ground)
  • Olive Oil – 1tsp
Method:
Take chopped onions into a bowl and add chopped capsicum, sweet corn, chopped tomatoes, chopped mushrooms and mix well. If required/desired parboil the vegetable mix in microwave oven by cooking on high power for 3 to 5 minutes. To the vegetable mix add salt, black pepper powder and olive oil. Mix all well together and the topping is ready to use.

Bread Pizza Making:
Toast bread slices till slightly crisp. To toast the bread slices use a pop-up toaster or use a flat griddle and toast on stove top. Here I have used the pop-up toaster. Insert bread slices into the toaster and toast till slightly crisp. To a toasted bread slice add some pizza sauce and spread evenly. Above the sauce, spread the pizza topping on the bread slice. Holding the grater above the bread slice, grate pizza cheese all over as shown in the movie clip. Ensure that the topping is fully covered with grated cheese. Transfer the prepared bread slice on to a high stand grill tray. Place the grill tray in oven and grill for 7 minutes or till cheese melts. Once the cheese is melted bread pizza will be ready to serve. transfer to a serving plate and cut with a pizza cutter or a sharp knife into 4 pieces for eating convenience.

Points To Notice: 
Using the bread dough make flat bread (Roll like Chapati) and proceed to get normal Pizza. Using bread makes the pizza crisper and tastier. As the melted cheese fries the porous bread slice it becomes extra crisp than the ordinary pizza.
Seasoning added in the sauce and topping may be adjusted according to taste.
After experiencing the taste and texture I found the home-made cheese a lot more tastier than the readily available mozzarella cheese. However it is a personal choice and one may experience it by tasting it.
Using chilled butter and chilled paneer gives a good texture to the pizza cheese.
Garlic may be reduced to two cloves if it appears pungent. Those who like the garlic flavor may use four cloves as given in the recipe.
Though Italian seasoning has oregano in it, I have added extra amount of oregano separately. As mentioned earlier, seasonings may be adjusted according to taste.
Fennel seeds powder gives a distinct flavor to the sauce.
Chopping the vegetables finely cooks them faster and makes rest on the base easily.
Check for the desired consistency while preparing sauce. If the sauce is thin bread slice will become soggy absorbing the moisture from sauce. If sauce is too thick it dries out faster while grilling. Basically see that the sauce sticks to the bread slice and gets fried while grilling to give flavor to the bread slice.
For topping use your choice of vegetables in the form you wish— one can use chopped vegetables as I have shown or one can use sliced vegetables to give a good look to the bread pizza.
Mushrooms change color when exposed to air especially after cleaning. Originally choose the white ones and in the process if they change color, still you can use them. Don't try to clean them under running water. Wipe them with damp kitchen towel /or kitchen napkin and cut them to pieces before using(using mushrooms is optional)
Parboiling the topping vegetables is another option. However finely chopped vegetables gets parboiled while grilling and gives a nice crunch to the pizza.
To toast the bread slices use a pop-up toaster or an OTG (Oven-Toaster-Griller), or toast using hot griddle on stove top.One can adjust the crispness as per choice.
Use high stand grill tray while making bread pizza, so that the bread slice will be nearer to the heat (Grill) and
gets done faster.
Now we can prepare PIZZA at home which children crave.
Serve hot to your family members and get their praises!!!!

Enjoy !!!!!!!!!!!!!!

Bread Balls

Bread Balls

Ingredients:
  • Small Bread Loaf (330gms)
  • Potatoes - 350gms
  • Onion - 1(65gms)
  • Ginger Small Piece
  • Green Chilies – 6
  • Few Curry Leaves
  • Mustard Seeds - 1/2tsp
  • Cumin Seeds - 1/2tsp
  • Dry Mango Powder - 1/4tsp
  • Salt to Taste
  • Turmeric Powder - 1/4tsp
  • Oil - 3tsps (For Curry)
  • Chopped Coriander - 2Tbsps
  • Oil for Frying Bread Balls

    Preparations:
    Take a small bread loaf and slice it. It will make 13 slices out of a small loaf weighing 330gms. Wash & boil potatoes in a pressure cooker. Peel the boiled potatoes and grate them. Grating the boiled potatoes gives a smooth texture which will help while making balls. Remove the skin of onion and chop finely. Wash and clean green chilies and ginger and make a paste in a mixer grinder.Wash & chop curry leaves.

    Making Curry:
    Heat a pan and add 3tsps oil to it. When oil is hot add mustard seeds and cumin seeds. Fry till the seeds splutter and add green chili ginger paste and curry leaves. Fry the seasoning well and add chopped onion and fry till translucent. Then add turmeric powder, dry mango powder, salt and grated boiled potatoes. Mix all well and add chopped coriander leaves. Mix again and transfer to a plate and cool.

    Making Bread Balls:
    Spread a paper napkin on a plate to drain the fried bread balls. Heat a pan and add sufficient oil to deep fry the bread balls. While the oil is getting heated up, make balls from the prepared curry. Wet fingers with water and take a portion of potato curry and shape into ball. Similarly make balls of the remaining curry. Add water in a flat & deep plate. Remove the crusts of bread slices with a knife. Take a bread slice and dip for few seconds in the water to soften it. Take the water soaked bread slice in a palm and press with another palm and squeeze out all the water. On the softened bread slice place a potato ball in the centre and bring the edges of the bead slice together to close it. Shape into a smooth ball and keep it aside. Similarly make few more balls. Now the oil is hot enough to fry the bread balls. Drop carefully the bread balls into oil and leave them for a minute. Fry the balls on medium heat. Turn the balls gently with a ladle or a spoon and fry on medium heat. Turning the sides fry the bread balls on medium flame only till they are golden in color. When done place the fried balls on the paper napkin to soak the excess oil.
    Now make another set of balls and fry them in oil turning the sides, till they are golden in color. Similarly fry all the balls and place them on the paper napkin to soak excess oil. Serve them hot with tomato ketchup.

    Points to Remember:
    Do not overcook the potatoes. Finely chop or grate the vegetables for a smooth texture. Otherwise the stuffing may protrude out of the prepared ball and that will come out while frying them in oil.
    After preparing the curry check the seasonings by tasting it. If required add salt and chili powder to taste.
    Here I have used home-made bread which is very soft. Do not soak the bread for long in water as it will become soggy and loses the shape. Dip for one or two seconds and take it on your palm and squeeze excess water by pressing with another palm. We need to soften the bread slice to shape it into a ball smoothly.
    Fry the balls on medium heat only. If fried on low heat the bread balls will soak excess oil. If fried on high heat the balls will get brown color fast but will not be fried evenly.
    Bread when fried in oil will soak lot of oil. So do not be tempted to eat more
    as it will trouble you later. It is advisable to drink at least two glasses of buttermilk to balance the system. Eat curd or drink buttermilk after eating any deep fried things.
    Serve the bread balls hot with tomato ketchup or any other sauce of your choice.Enjoy !!!!!!!!!!!!!!

Bread

Bread
Ingredients:
  • Maida – 250gms
  • Extra Maida – 5gms
  • Dry Yeast – 10gms
  • Sugar – 35gms
  • Salt – 10gms
  • Oil – 15gms
  • Water – 135gms

    Preparations:
    Take water in a microwave safe bowl and place this bowl in oven. Heat the water on high power for 15 seconds. Now if you measure the temperature it will be between 40oC and 50oC. Take sugar in a hand mixer bowl and add this luke warm water and dissolve it by stirring. Now if you measure the temperature it would have come down. Wait till the temperature is between 38oC and 40oC. Now add the yeast and stir to mix. At this (38oC and 40oC) temperature the yeast multiplies fast. So do not be in a hurry—let the temperature be right for perfect raising bread. After adding yeast allow the yeast to ferment. So leave this bowl aside for 10 to 15 minutes or till the mixture is foamy and bubbly.
    Meanwhile take a deep bowl and add oil to it. Smear the oil all over the bowl and keep it aside. After preparing the dough we will keep it in this oiled bowl so that the dough will not get dried up. After 15 minutes, observe the yeast mixture. Now the yeast solution is foamy.
    Fix a hand mixer to its stand and arrange flour kneading blades to it. Stir the yeast solution and add salt and oil and mix. Fix this bowl to the hand mixer stand and run it on low speed. Slowly add the flour while the machine is running. When half of the flour is added, increase the speed of the mixer to medium. After adding the entire flour, increase the speed of the machine to high and knead it. Observe that the dough is soft and sticky. Sprinkle a little maida from the extra maida taken on a clean platform. Transfer the dough to the floured platform and start kneading with hand till it is smooth. If the dough is sticky dust your palms with maida and start kneading it. Fold the dough and turn around a quarter and again fold it and turn around a quarter—like this repeat till you get smooth dough. When the dough is smooth place this dough in the oiled bowl and turn it so that the dough is covered with oil from all sides. Cover the bowl loosely with a plastic cover. Allow it to rise until doubled or even more, about one hour. In the video you can see that it has almost become three times

    Method:
    Take an aluminium loaf pan and add oil to it. Smear the oil all over the pan and keep it aside. After one hour observe that the dough raises 3 times the original quantity. Punch it down and bring back the dough to its original size. Sprinkle some flour on a clean platform and knead the dough for few seconds. Make it into log shape and pinch the seams. Place this dough in the prepared loaf tin and spread it evenly. Cover the pan loosely with a plastic cover and keep it aside for raising. After nearly one hour observe that the dough is double in size. Now the dough is ready for baking. Preheat the oven in convection mode at 180oC. Apply milk on the top surface of the dough with a brush or dip a paper napkin in milk and coat the dough with milk. One can even give an egg wash to this dough for a nice golden crust. Place this pan in the preheated oven and bake for 30 minutes at 180oC in convection mode. Depending upon the color of the bread and the doneness, increase or decrease the time slightly. When done remove the pan from the oven and wait for few minutes. Loosen the sides with a knife and turn the bread on to a wire rack. Turn it around and tap to hear a hollow sound which indicates that the bread is baked properly. Apply ghee or butter on the bread so that it will not dry. Cool the bread completely on the wire rack before slicing it. When the bread is completely cooled off take a sharp knife and cut it into slices. Store them in a box till use.
    We can prepare many dishes like sandwich toasts, bread rolls, French toast with bread. Enjoy baking bread for the nice aroma which fills the home while baking.

    Points to Notice:
    See that the yeast is not out-dated. The entire trick of this recipe lies in yeast rising. There are many types of dry yeasts available such as active dry yeast, instant dry yeast, fast action yeast etc.. Here, at the place where I reside, only one type of yeast is available among the dried yeasts. It is available by the name dry yeast. I have used this dry yeast for this recipe.
    Yeast is temperature sensitive:
  • At less than 10oC (50oF) the yeast is inactive.
  • At 15oC – 21oC (60oF – 70oF) the yeast action is slow.
  • At 32oC – 38oC (90oF – 100oF) the yeast is at its optimum temperature for fermentation.
  • At greater than 40oC (104oF) the yeast action starts to slow.
  • At 58oC (138oF) the yeast is killed.
So it is better to have a candy thermometer at home to find the right temperature to add the yeast. It’s advisable to invest in one thermometer. Gauging the temperature with bear hands is almost impossible. Since yeast is a living organism, it dies beyond 580C which fresher’s to baking cannot make out.
Salt is used not only as a flavor but as a regulator of the growth of the yeast. Salt retards the action of the yeast. So use it only after the yeast is proofed completely.
Kneading the dough in a food processor or hand mixer eases the work. However if you don’t have one, knead it with your palms into a smooth dough with no streaks of dry flour or surplus liquid. Pull and stretch the dough, working on a flat surface so that you can push strongly. Fold the dough and turn around a quarter and again fold it and turn around a quarter—like this repeat till you get smooth dough.
Allow the dough to rise completely without bothering specified time. Rising is the first part of the yeast’s growth. The fermentation produces carbon dioxide that aerates the dough and it should double in size. Prevent a dry skin forming on the dough by rolling it round the oiled bowl, cover with a plastic cover and put in a warm place to rise.
Knock back the dough by punching it. The rise will collapse, flattening the large spaces previously filled with the aerating gases that will escape. After the second rising there will not be any yeasty flavor and the bread will be ready for baking. This second rising will produce the dough, resulting in even texture and a sweet mature flavor. This process is called proofing or proving.
Brush the raised dough with milk or give egg-wash to get a nice golden crust after baking.
When you can see that the dough is rising well during the proof and developing a nicely domed top, put the oven on to pre-heat. Yeast dough requires a really 'bold' start to kill the yeast as quickly as possible. This prevents large holes forming in the bread.
Baking time may vary with different ovens or OTG’s. So keep a watch while baking once the bread starts changing color. In ovens where there is no turn table then manually you may have to turn the pan in between for even browning. When removed from the pan and tapped underneath the bread, it should give a hollow sound for the doneness. Always cool the bread on wire rack or the condensed steam will make the bread heavy.
Always use gloves as the inside of the oven will be too hot.
It feels great when the room is filled with the aroma of freshly baking bread. As we are not using any improvers we know how fresh our bread is.
In this recipe I have given measurements in weights rather than in Cups. This I have standardized because always it remains a question as to what a standard cup measure is. To clear that confusion I have used only weights as measurements so that the recipe will never fail. Weights will be same all along the world but cups may differ. So it is advisable to weigh the ingredients to get the perfect bread. Similarly for seeing temperature a candy thermometer is a must. The right temperature of the liquid is necessary for the yeast to multiply. Then the recipe will never fail.
Here when I prepared this bread the room temperature on that day is 30oC. During summers the time to heat the water in a microwave may be reduced further to say 7 or 10 seconds. So always it is better to measure the temperature just before
adding the yeast and that is the easiest way for baking good bread. 
Don't forget to keep the yeast in a sealed condition till next use. If it comes in contact with air and moisture, its action reduces.
 
Enjoy !!!!!!!!!!!!!!